Milk Washing 101: Transforming Your Cocktails

Where did this come from?
Milk washing has roots extending back to the 1700s in England, where it was originally used to smooth out harsh spirits. Known historically as "milk punch," this clarification method served dual purposes: preserving drinks in the pre-refrigeration era while making them more palatable.
The Chemistry: Why It Works
The milk washing process relies on a specific chemical interaction between milk proteins and compounds in your spirits. When acid comes into contact with milk, the proteins (primarily casein) coagulate and form curds. These proteins carry a positive charge and actively bind with negatively charged particles in your cocktail ingredients – particularly polyphenolic compounds (tannins), volatile compounds, and oxidative elements.
This binding process effectively removes these compounds from your cocktail, leaving behind a clarified liquid with transformed characteristics. The process alters not just the appearance but fundamentally changes the molecular composition of your drink.
Milk washing is ironically a combination of fat washing and clarification that occurs at the same time. Know this is important because it is the thesis statement for what you’re doing to the cocktail.
What It Does to Your Cocktail
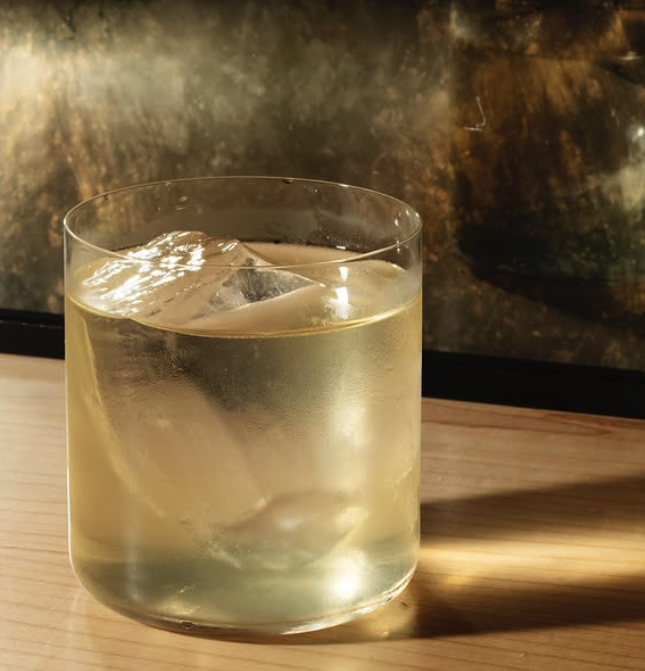
Gin Old Fashioned
Milk washing creates several notable transformations in your cocktail:
Smoothness: The removal of tannins and harsh compounds results in a remarkably smooth mouthfeel.
Clarity: The resulting liquid achieves impressive visual clarity, despite potentially starting with cloudy ingredients.
Refined Flavor Profile: Sharp edges are softened while core flavors remain intact.
Extended Shelf Life: The removal of volatile and oxidative compounds increases stability.
Subtle Dairy Notes: A minimal but detectable "milky" flavor remains, adding complexity to the finished product.
Silky Texture: The dairy fats that dissolve into the alcohol create a silky texture that coats the palate.
Tips for Perfect Milk Washing
Milk Matters: Choosing Your Dairy (or Non-Dairy)
Proteins and fat serve different functions in milk washing. The protein content (about 8g per cup in most milk) is responsible for the clarification, while the fat content (varying from 0% in skim to 3% in whole milk) influences mouthfeel and texture.
Dairy options:
Whole Milk: The standard choice with balanced protein and fat
Skim Milk: Same protein content but less fat, resulting in less creaminess
Cream: Less protein but more fat, excellent for blending with milk for richer results
Non-dairy alternatives: Can be effective if not loaded with emulsifiers
Almond Milk, Pistachio Milk, Cashew Milk:
Coconut Milk: The hardest one to work with in my experience
What doesn't work well:
Seed-based plant milks like rice and oat typically lack sufficient protein
Any milk alternative with excessive binding agents that prevent proper curdling
The Importance of Acid
Using enough citrus is crucial – approximately 25% of your total batch, depending on:
The freshness of your citrus juice
The pH level of your chosen citrus
The type of juice you use (Grapefruit, Lime, Lemon, Passionfruit etc.)
The acid component is what triggers the curdling process, so inadequate acidity will result in incomplete clarification.
Patience in the Process
The curdling reaction should begin upon mixing, but the complete process takes time:
Allow natural separation to occur through gravity
Expect to wait up to an hour for full separation
Don't rush the filtration process, as this affects final clarity
The longer you wait though the more sharpness the cocktail will have
The filtering process through the curdle is the key element, runing the cocktail through a filter and the subsequent curdle that is trapped in the filter is the key element to this technique. I’m not smart enough to know why but a few hundred batches of milk washing later I can tell you that this is accurate. We used to try and switch out filters because they would slow down once the curdle clogs the filter but this always led to lower quality batches. Leave the curd alone - if you truly need to change the filter because the straining process has ground to a halt keep the curd and scoop it into the new filter out of the old one
Filtration
For best results:
Use a grease cone filter for the initial strain - Coffee filters also work but they tend to be finer and clog much faster and often stall out for larger batches.
The first 200ml will likely be cloudy – pour this back through the filter
For stubborn cloudiness, refrigerate for several hours and strain a second time through the original curdle
Proportions
For successful clarification, maintain these ratios:
For better mouthfeel, a 5:1 ratio of cocktail ingredients to milk works well - truffle on the rocks did a full taste through and his conclusion was around 30-33% milk to cocktail batch but I recomend you play with this ratio. I think it’s less about a universal rule of thumb and more about what you’re attempting to milk wash. Start at 20% and work up from there.
For example, with a six-liter batch:
6 liters of cocktail ingredients
1L Whole Milk for the remaining liter
The filtering process will leave you ideally with a little less than 6L of batch
Step-by-Step Milk Washing Process
Follow these precise steps for successful milk washing:
Prepare your containers: You'll need three containers—one for your milk and one for your cocktail batch and then another for your milk wash to strain into.
Add milk to the first container: Measure and pour the proper amount of milk or milk alternative into your first container. This should be about 1 part milk to 5 parts cocktail mixture.
Batch your cocktail: In the second container, combine all other ingredients of your cocktail (spirits, citrus, sweeteners, etc.). Ensure you have approximately 25% citrus component to facilitate proper curdling.
Combine the mixtures: Pour your cocktail batch over the milk—not the other way around. This order is important for proper curdling.
Stir thoroughly: Gently but thoroughly stir the combined mixture.
Let it separate: Allow the mixture to curdle and separate naturally for 30 minutes to an hour. You'll notice the formation of distinct curds and a clearer liquid.
Prepare your filter: Set up either a coffee filter or a cone filter. For best results, a grease cone filter works exceptionally well.
Begin straining: Pour the mixture through your filter. The first 200ml or so will likely be cloudy.
Re-filter the cloudy liquid: Pour this initial cloudy liquid back through the filter.
Complete the filtration: Continue filtering until all liquid has passed through and only curds remain in the filter.
Second filtration (if needed): If the result isn't clear enough, refrigerate for a few hours and strain a second time through the original curdle.
Store properly: Keep your clarified cocktail refrigerated in a sealed container.
The Final Result
While some bartenders claim there's no dairy flavor in the final product, you can taste it if you’re even kind of paying attention, it’s just mixed in with everything else you just did. This is a part of the equation for figuring out what you want the final product to taste like and what dairy or alternative option you are choosing.
When done correctly, milk washing transforms ordinary cocktails into sophisticated, silky smooth creations with enhanced complexity and remarkable visual appeal. The technique requires precision and patience, but the results are well worth the effort for anyone serious about elevating their cocktail game.
Whether experimenting with a classic milk punch or creating a signature concoction, understanding these fundamentals will help you master this technique.